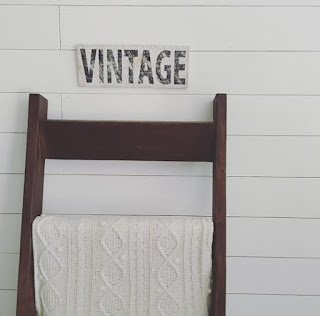
Hello! Remember when I said summer would be the perfect time for me to blog more? LOL! School starts back in a week and this is my second post for the whole break. So much for that! Needless to say, it has been a busy season and luckily the hubs and I were able to squeeze in one more (cheap) DIY project before it gets even busier! It's no secret that I love shiplap. If I could shiplap my whole house, I would do it in a heartbeat. However, it took us 4 days and a lot of headache to get just one wall done, so that will certainly not be happening.
SO, most of you know that I had "shiplapped" my mantle awhile ago and settled on painting the rest of the wall white in lieu of continuing with it.
Well long story short, I decided that wasn't enough. I approached my hubs with the idea this past weekend. I proposed we use the exact same materials as we did for the mantle (a cheaper shiplap alternative) but simply, multiplied. If you didn't catch it in my original shiplapping tutorial, here is what we used instead of actual shiplap or the other popular alternative, tongue and groove boards:
- Six 8x4' Sheets of 1/4 inch Plywood Underlayment (We had to have ours cut down into Twelve 8x2' sheets in order to fit them in the back of my car and transport them home!)
They look like this:
(Peep my donut float making a cameo in the bottom right corner.)
We got ours at Home Depot for about $12 a piece.
- White Paint
We put a couple coats of Behr Premium Plus Ultra (Say that 5 times fast) Ultra white paint (with nothing mixed in) on the boards. It took about a gallon and a half to finish this project. Please ignore the awkward arm positioning...I have no idea what I was doing at the time.
- Table Saw
Next, the most noisy and time consuming part of this process, cutting the boards. We cut ours into 6 inch wide strips. We left them all at 8 feet long so that we could use some and cut some down later when we knew more exact measurements. Ignore how hideously ugly our garage is...it was raining so we had to move everything indoors.
After we cut the strips, I applied a third and final coat of paint to them (the table saw was a little harsh on some) and we were FINALLY ready to start putting these bad boys on the wall.
This...as you can imagine...was a SLOW process. First, we actually had to remove the existing shiplap so that they would not make the rest of the wall look wonky. Wonky is a term my sister and her friends use all the time and now she has me saying it. I do feel as though it is a great description for this particular instance however. Anywho, we actually had a little laugh after removing the boards because both of us had forgotten that we put them up before re-painting the rest of the wall.
- Hammer, Finishing Nails, A whole lot of patience
Next, the actual assembly. Yay! We had every intention of making a time-lapse video of the whole process but then promptly forgot. Oh well. We used tiny finishing nails to attach the boards to the wall and nickels (sorry cashier at target for requesting $2 in nickels as part of my cash back...it was all for the cause!) to space them out. Who needs actual spacers when you have loose change that you can spend again later...am I right? I apologize in advance for the HORRIBLE lighting. All of this work was basically done at night.
Slowly but surely, board by board, it all came together. One rookie mistake we made that I will warn you about now...we used galvanized finishing nails. Never use galvanized nails when you're working with and handling white wood. By the time we were finished, there were almost more black fingerprints and smudges than there was white paint. Luckily, magic eraser came to the rescue and cleaned it all up for me. I had originally planned to go back with a paintbrush and cover up the little nails, however the more I looked at them showing in all their glory, the more I loved them. I feel like it looks more authentic with them showing and I am all about that!
Here are some before and afters of the finished product:
It was a lot of work, but oh so worth it! I apologize again for my utter lack of blogging this summer but I promise before you know it, I'll be back at it with all of my favorite fall decor! Thanks for reading and happy friday eve!


No comments:
Post a Comment